

Earlier this year I was asked if I could make an extra long pair of my Rockhammer earrings. These were a leaving present for someone from her work colleagues.
On the day I started making them, we had a visiting photographer, Ben Boswell at Manor Oaks Studios. Ben took photos of my work in progress. I had already textured some Argentium silver ready to begin the earrings.
I began by drilling two holes in the piece of Argentium, while it was still flat. This is an Archimedes drill.

II used a piercing saw to cut out the individual leaf shapes for the earrings.

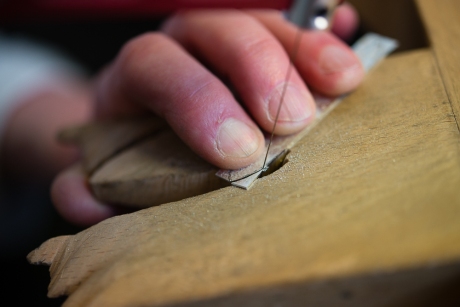
Next I filed the edges
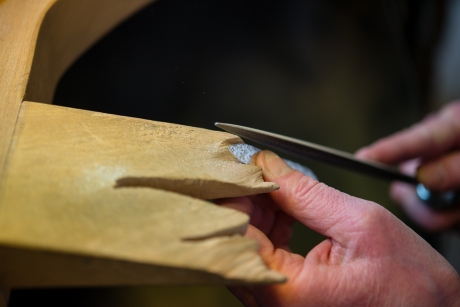
then sanded them smooth, using wet and dry paper in my pendant drill

The shaping was begun using an anticlastic raising stake, and a mallet.
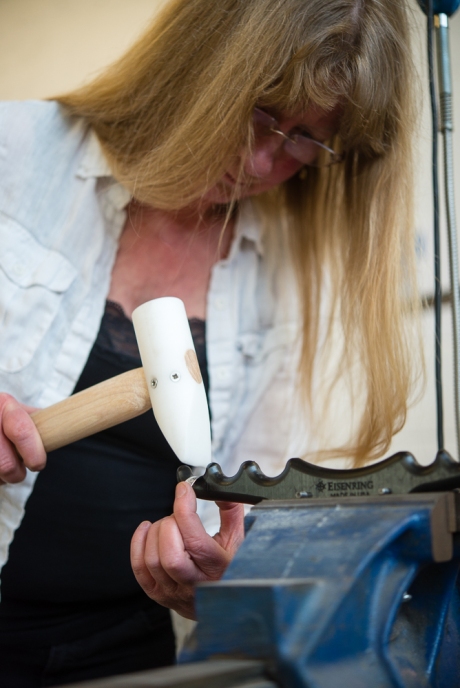
Annealing the Argentium part way through the shaping, to make it malleable again after work hardening
I work down each ‘valley’ on the stake to make the curve deeper until I am happy with it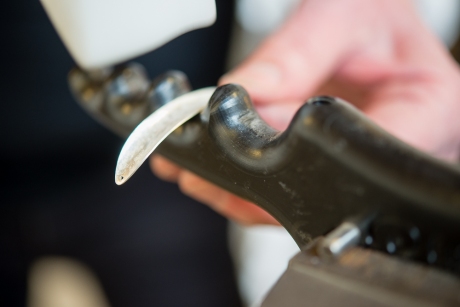
Once I am happy with the curvature, I twist each piece, remembering to make them curl in opposite directions!
The first one is done, now to make the other one 
Making a coil of jump rings, to hang the earrings 
Sawing the coil into individual rings
Attaching a jump ring. This was then soldered, and hung from an ear wire which I had already made. Then I polished the earrings using a brass brush and soapy water, to give a soft satiny finish.
Having Ben photographing each stage made me realise just how much goes into a pair of earrings. At first I felt a bit self conscious about being photographed, but after a while I just got into my making zone and almost forgot he was there.
Oh and the recipient was very happy with her present!
